Roasted Cheesy Potatoes

17 04 2011

One of my favorite things about breakfast is the tasty, savory, potato-y side dish! This particular version is inspired by the roasted potatoes with cheese from a crepe place I used to frequent in Pittsford, NY. It works just as well as a dinner or lunch side as well.

roasted cheesy potatoes


Ingredients:

• 1 lb baby red potatoes, quartered
• extra virgin olive oil
• 3 garlic cloves, minced
• 1 Tbsp chili powder
• salt and pepper to taste
• 1/2 cup shredded sharp cheddar cheese (or more!)
• dried basil


Directions:

1. Preheat the oven to 400º F.
2. Toss the potatoes, garlic and olive oil in a glass baking dish, and season with chili powder and a small pinch of both salt and pepper.
3. Place dish in the oven on the middle rack and bake until potatoes are soft and edges have browned (roughly 40 minutes). While roasting, toss the potatoes with a spatula every 15 minutes or so, being sure to scrape any sticking spuds from the bottom.
4. When the potatoes look almost done, turn the oven up to 500º F and remove the potatoes.
5. While the oven heats up, season the potatoes with a generous pinch of salt and freshly ground black pepper and sprinkle the shredded cheese over the top.
6. Return to the oven (this time on the top rack) and roast another 5 to 10 minutes, until the cheese is fully melted and bubbly.
7. Smoosh a large pinch of dried basil in the palm of your hand with your thumb, and sprinkle over the top.


Recommended Serving Instructions:

Serve alongside your favorite breakfast main dish (omelet, scramble, etc.). However, the great thing about these potatoes is that they are so flavorful and filling, they could go with just simple eggs and toast – it takes the pressure off of doing a whole, elaborate meal.


Tips:

•To cut down on the baking time and to ensure a more evenly cooked set of potatoes, you can boil the potatoes for 5-10 minutes before preparing and roasting.



Cucumber Finger Sandwiches

23 11 2010

Perfect for any afternoon tea party or as an appetizer to your Sunday summer soiree, these little sandwiches are refreshingly good and easy to make.

cucumber sandwich


Ingredients:

•pumpernickel bread, sliced very thin
•cream cheese
•cucumber, sliced thinly
•red onion, sliced thinly (optional)
•lemon pepper


Directions:

cucumber sandwich 11. Toast the bread until browned.
2. Spread cream cheese onto two pieces of bread. You want it to be just thick enough so that you cannot see the bread through the cream cheese, but not much thicker.
3. Layer a single layer of onion and then cucumber.
4. Sprinkle the cucumber generously with lemon pepper.
cucumber sandwich 25. Cover with the other piece of bread with cream cheese and press the sandwich together firmly.
6. Wrap the sandwich tightly in plastic wrap and chill for at least 30 minutes (or up to 1 day before serving).
7. Unwrap the sandwich and cut into small squares. Serve immediately.


Tips:

•The bread part is easiest if you can find the shrink-wrapped bread made for this very dish. I find mine at Whole Foods, although I’m sure you can find it elsewhere. You can also ask your local baker to cut a loaf of bread as thinly as possible. Either way, it saves the frustration of doing it yourself at home!


Baba Ghanoush

27 10 2010

baba ghanoush 1I have always been a big fan of this creamy, smoky dip. As I was walking through the farmer’s market the other day, I saw some beautiful eggplant and was instantly inspired to attempt making some from scratch. It turned out to be surprisingly simple and incredibly tasty.


Ingredients:

baba ghanoush•2 1-pound eggplants
•1/4 cup extra virgin olive oil
•1/4 cup tahini
•3 Tbs lemon juice
•1 garlic clove, chopped
•pinch of salt
•freshly ground black pepper


baba ghanoush 2Directions:

1. Pre-heat oven to 375º F and generously oil a baking sheet.
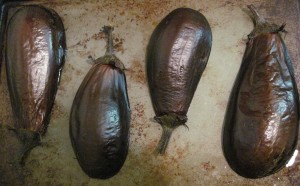
2. Slice eggplants in half, lengthwise, and place cut side down onto the pan. Bake for about 50 minutes, until the flesh is very soft.
3. Scoop out the flesh into a strainer and place over a bowl. Let the eggplant drain excess liquid for 30 minutes.
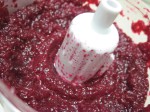
4. Place all of the ingredients into a food processor or blender and blend until almost smooth.
5. Chill until use, allow to rest at least 1 hour.
6. Serve at room temperature.


Recommended Serving Instructions:

Serve at room temperature as a dip with pita bread or pita chips.


Bittersweet Chocolate Ganache

17 10 2010

Ganache is surprisingly easy and, in my opinion, a much richer, classier alternative to frosting. I used this to make and decorate my beetnik cake. It was easy to work with, looks great, and tastes even better!

ganache

This recipe is from the June 2009 issue of Bon Appetit.


Ingredients:

•5 oz. unsweetened chocolate, chopped
•1/4 cup chilled butter, cut into 1/2-inch cubes
•1/ tsp vanilla extract
•3/4 cup heavy whipping cream
•3/4 cup sugar


Directions:

ganache 11. Place chopped chocolate, butter and vanilla in medium bowl.
2. In a medium saucepan, combine cream and sugar and bring to a boil, stirring to dissolve sugar.
ganache 33. Pour hot cream mixture into bowl with chocolate and let stand 1 minute.
4. Whisk until melted and smooth.
5. Chill ganache until thickened and spreadable (about 1 hour).


Beetnik Cake

17 10 2010

beetnik cakeI decided to finally make and share this recipe for beetnik cake: a chocolate and beet cake with subtle flavor and beautiful color. It goes well with raspberries (the batter even smells like raspberries) and chocolate ganache.

While the name of this blog has nothing to do with the cake with the same name, the two undeniably share a name. Plus, beetnik cakes are made with real beets, so this should be of interest to most veg cooks.

Thanks to Vegalicious for providing the inspiration and recipe!


Ingredients:

•3 large beets (to make 1 & 1/2 cups pureed beets)
•3 eggs *egg substitute to make vegan
•3/4 and 2 Tbs cup vegetable oil
•1 1/4 cup granulated sugar
•1 tsp vanilla extract
•2 cups all purpose flour
•1/2 cup unsweetened cocoa powder
•1 1/2 tsp baking powder
•pinch of salt


Directions:

beetnik cake 11. Preheat the oven to 425º F.
2. Wash the beets, trim the ends off and cut in half. Place in a large baking dish and add a little water to steam them.
3. Cover in foil and bake for 30-45 minutes, or until the beets are easily pierced with a knife.
4. After letting the beets cool some, slip off the skins under running water.
5. Puree the beets in a medium bowl.
6. Add eggs, oil, sugar and vanilla and mix well.
7. In a large bowl, combine flour, cocoa powder, baking powder, and salt.
beetnik cake 28. Add the beet mixture to the flour mixture and stir until thoroughly combined – thickness should be similar to a brownie batter. You can add up to 1/4 cup water if too thick.
9. Pour the batter into a prepared (oiled and dusted with flour) 8 x 9 baking dish and place in the preheated oven to bake for 30-40 minutes. The cake is done when the center of the cake springs back.
10. Let the cake cool for 10 minutes before removing and transferring to a cooling rack. Let the cake fully cool before preparing (cutting, forming, frosting, etc.).


beetnik cake 3Serving Suggestion:

This cake has been layered with a raspberry filling in the middle and slathered with a bittersweet chocolate ganache. Of course, the decorative aspects are completely up to you! But, whatever you decide, get creative and ambitious! I NEVER bake and I managed to do this, which, in my humble opinion, looks AND tastes pretty great!


Tips:

•The beet puree can be made in advance. So if you want to spread out the cake prep, that’s a great project to do ahead of time.
•This cake works great if you cut into thin layers and layer with a rich and sweet filling (such as raspberry filling or ganache). It also goes well with walnuts which you could just add to the batter before baking.
•Use cake scraps to mold 3-D design, using ganache as both glue and primer. Then mix butter cream or another white frosting with food coloring to serve as paint.